On this page ▾
Content Asset Download
Navigate to Merchant Tools > Content > Content > content_asset_ID - the content asset creating/editing page. Throughout our experience with Salesforce B2C Commerce we have noticed that content assets often have to be exported so they can be reused for other instances. DWithEase offers a quick and easy way to achieve this as simple as a button click. Scroll down to the bottom of the page and you will see a button  . Click on it to start downloading the content asset in XML format.
This video demonstrates how Content Asset downloading works.
Shortcuts
While browsing through different pages on your instance you can sometimes see a keyboard icon showing -  The icon only appears on pages that support the Shortcut feature. Shortcuts are easy to use and time-saving. You can simply hover over the icon to see the key combination for the shortcut and its corresponding action.
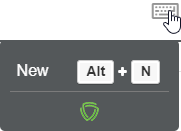
The left part of the menu is giving information about the action which can be triggered by pressing the Key combination (the right side). In this example pressing Alt + N will create a new content asset.
You can configure your own shortcuts by navigating to chrome://extensions/shortcuts
Example: The Merchant Tools page will not display the keyboard icon because the page doesn’t have any shortcuts but navigating to Merchant Tools > Content > Libraries > RefArchSharedLibrary > Content will make the icon appear.
Hovering the icon on the New Content Asset page Merchant Tools > Content > Content > New Content will display two actions:
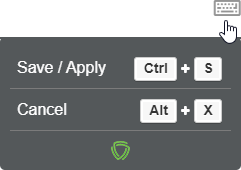
Ctrl + S - Will Save or Apply current changes.
Alt + X - If the current page has a Cancel button, this combination will trigger its pressing.
Navigating to a content asset: Merchant Tools > Content > Content > content_asset_ID and hovering over the icon will show different actions:
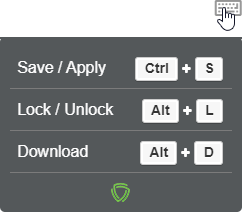
Ctrl + S - Will Save or Apply current changes.
Alt + L - Will Lock or Unlock the current Content Asset.
Alt + D - Will download the current asset with Asset Download.
JSON and HTML Formatting
DWithEase is offering JSON Formatting. In many fields, you must create/modify JSON objects. They can be hundreds of lines and if they are not styled or beautified that makes it really tough for reading. Sometimes a single comma or a quote can break the whole JSON object and that might be critical. With the JSON Formatting feature, you can prettify it easily and get alarmed in realtime if there are any syntax errors.
This video demonstrates how JSON Formatting works.
Before HTML formatter:

After HTML formatter:

BM Toolbar
DWithEase offers a Toolbar that is available in the Business Manager. Its main purpose is to make your experience easier and faster by giving you quick access to the most commonly used modules. Image of the toolbar and full list of its components:

Toggle
 - Clicking on the DWithEase logo will collapse/expand the DWithEase toolbar.
Cache
Clicking on “Cache” will take you to the Business Manager Cache page (Administration > Sites > Manage Sites > My Site - Cache)
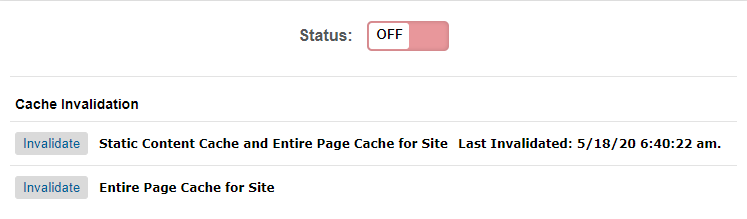
 - Clicking on the arrow will expand the following menu:
Search Indexes
Search Indexes - Clicking on “Search Indexes” will open the Business Manager Cache page (Merchant Tools > Search > Search Indexes)
 - Clicking the arrow will expand the following menu:
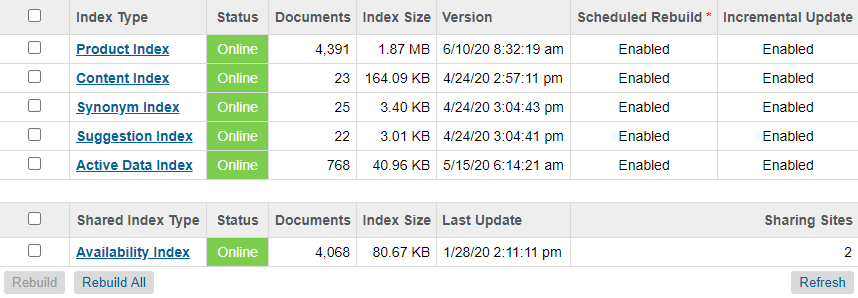
Clicking on an Index Type will lead you to its Business Manager Index Type page.
To rebuild one or more indexes you have to select the checkbox of each Search Index you would like to rebuild and then click  . If you want to rebuild all search indexes there is also a
  button.
Code Versions
Clicking Code Versions will open the Business Manager Code Deployment page (Administration > Site Development > Code Deployment)
 Clicking the arrow next to Code Versions will expand the following menu:

You can see in the Actions tab the Rename and Activate actions available for each Code Version: 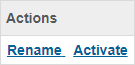
- Activate will make the Code Version active.
- Delete will remove the selected Code Version.
Details about the buttons on the bottom of the menu:
- Reinitialize Active Code Version - Will execute the following chain of requests -> Create an empty code version, activate it, then switch back to your active code version and delete the created empty version. You might find the functionality useful in those cases when you manually have to switch between code versions to fix some issues.
- Roll Back - Revert to the last active code version.
- Delete - Delete the marked Code Version.
- Add - Add a new code version to the list of existing ones, but you will have to give a name to your new Code Version and click the Apply button:

Cartridge Path
The Cartridge Path module gives quick access to the Cartridge Path located at Administration > Sites > Manage Sites > My Site - Settings page. Clicking on Cartridge Path will take you to that page. It allows you to easily view and manage the cartridge path for your current active code version in the current context (Business Manager or Specific Site)
Clicking the arrow next to Cartridge Path  will expand the following menu:
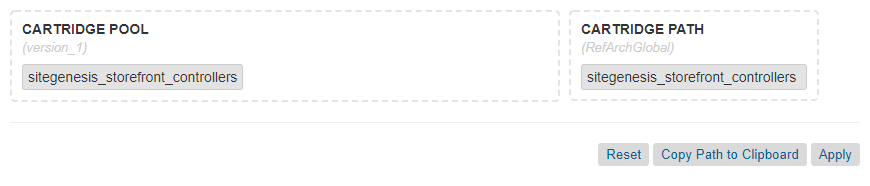
Let’s divide the menu into two halves: Cartridge Pool and Cartridge Path:
- Cartridge Pool - In this pool are located all of the cartridges that are uploaded but NOT included in the current Cartridge Path of the current Site. They are also ordered as the order in Administration > Sites > Manage Sites > My Site - Settings page.
- Cartridge Path - A list of all of the cartridges that are included in the Cartridge Path of the current Site.
By clicking on one of the cartridge boxes and dragging it you can either Add or Remove it from the cartridge path. Dragging it from Cartridge Pool to Cartridge Path will include it in the path, dragging it out from Cartridge Path into Cartridge Pool will exclude it.
At the bottom of the Cartridge path area you can see 3 buttons:
- Reset -Reset the Cartridge Path to its previous state and revert any changes that were not applied.
- Apply - Apply the current changes and edit the Cartridge Path.
- Copy Path to Clipboard - Copy the Cartridge Path as text and save it into your machine’s clipboard.
Example: Our Cartridge Path looks like this:
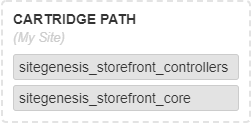
Pressing the Copy Path to Clipboard button will copy the following text:
sitegenesis_storefront_controllers:sitegenesis_storefront_core
Search
The search component  is located in the DWithEase Toolbar :
It allows you to look up both Merchant Tools and Administration menus, as well as doing direct searches for Products, Customers, Content Assets, or Orders by typing a search query. You can instantly focus the search field from anywhere in Business Manager using the hotkey Alt + S.
Site Preference Index Visibility
When searching site preferences, DWithEase inspects the search index status:
- Displays an index status header above search results.
- Alerts you with a clear warning message if the site preference search index is missing or out of date.
- Shows a helpful empty state if no preferences match your query.
Typing “data” in the Search Input will display the following results:
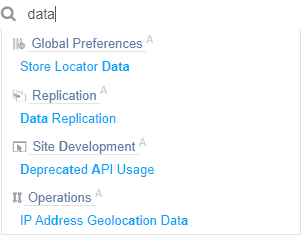
You can type the actual name of any product, content, or customer. Let’s try with the phrase “Cluster” which is an actual part of the product name “Cluster Drop”. This is the Search result from typing it in the Search Input:
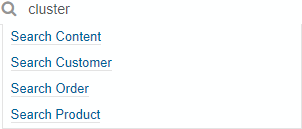
Now if you click on Search Product it will take you to the Products page with Search results of all products containing the phrase “Cluster”, like this:
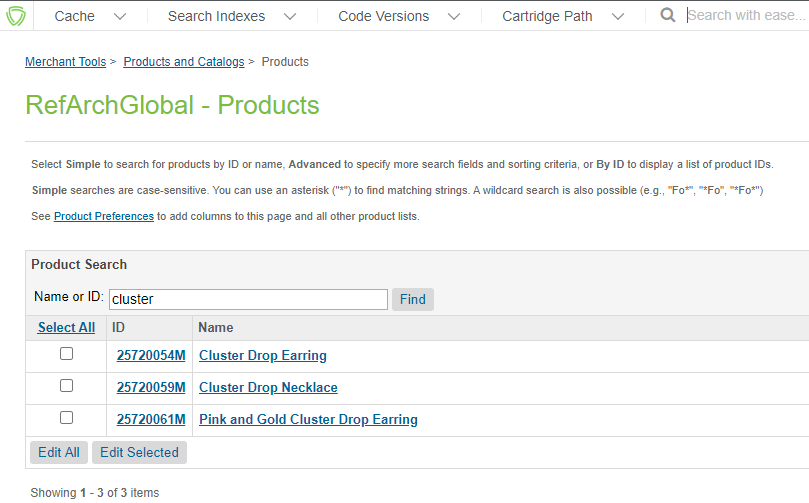
The next example is when you type an ID - of order, product, content, or customer (for example 001) the Search Results would be the following:
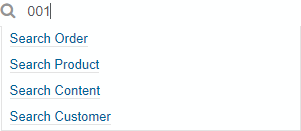
You can search by order number by clicking - Search Order. It will open the Orders page and will search for any order with the given ID (in our example “001”).
Here is a video summarizing all of the Business Manager Toolbar components:
Production Controls Injection
In staging and production Salesforce Commerce Cloud environments, Business Manager disables or hides several essential buttons and checkboxes by default. This limitation frequently forces developers and administrators to perform extra manual operations or workaround steps.
DWithEase includes an Enable Production Controls Injection setting under Options > Settings > Business Manager. When activated, the extension safely re-injects the missing controls into production screens:
- Merchant Tools › Products and Catalogs › Catalogs: Restores catalog selection checkboxes and the missing New and Delete buttons.
- Administration › Site Development › Custom Object Types › Attribute Definitions: Restores the New and Delete buttons for attribute definitions.
- Administration › Site Development › Custom Object Types › Attribute Groups: Restores the New Attribute Group creation form and Delete action.
- Administration › Site Development › Site Import & Export: Restores the import controls and enhanced export functionality.
Account lock protection is active at all times: if invalid credentials or an authentication anomaly is detected, DWithEase immediately stops automated actions to ensure your account is never locked.
Custom Plugins in Business Manager
With DWithEase Plugins, you can write custom user scripts (JavaScript) and custom styles (CSS) that run directly inside your Business Manager tabs.
- Target Any Screen: Configure scripts to run on all Business Manager pages or target specific URL patterns using wildcards or regular expressions.
- Built-in Editor: Write and test your plugins inside the extension options with syntax highlighting and instant enable/disable switches.
- Share & Collaborate: Export your plugins as JSON to share with teammates or download community plugins from the ForkPoint DWithEase GitHub repository.
For full setup instructions, see the Plugins configuration guide.
Context Menu
DWithEase also provides a custom Context Menu. It can be opened by right-clicking anywhere in Business Manager or Storefront.
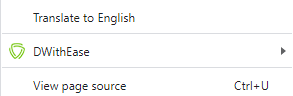
Hover over the DWithEase Context Menu to see the available list of options:
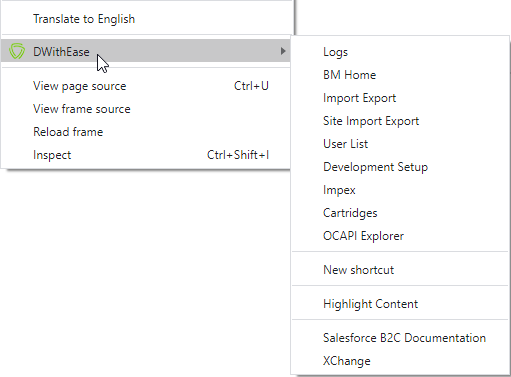
Functions
The options delivered by DWithEase are the following:
- Logs - Quick access to WebDav Logs page
- BM Home - Quick access to the Business Manager Home page.
- Import Export - Quick access to Import & Export page located on Administration > Site Development > Import & Export
- Site Import Export - Quick access to Site Import & Export page located on Administration > Site Development > Site Import & Export
- User List - Quick access to User List page located on Administration > Organization > Users
- Development Setup - Quick access to Commerce Cloud Development Setup page located on Administration > Site Development > Development Setup
- ImpEx - Quick access to WebDAV ImpEx page located on your-dev-domain.demandware.net/on/demandware.servlet/webdav/Sites/ImpEx
- Cartridges - Quick access to Cartridges location in WebDAV located on your-dev-domain.demandware.net/on/demandware.servlet/webdav/Sites/Cartridges
- OCAPI Explorer - Quick link to the OCAPI Explorer, with your sandbox domain pre-filled in the search.
- New shortcut - Clicking on it will take you to Create new shortcut page in DWithEase Settings page:
- NOTE: The shortcut URL will not include your current Business Manager domain (for example your-dev-domain.demandware.net) which makes the shortcut reusable in every Sandbox Instance you visit.
- NOTE #2: The URL field will be pre-filled by default with the URL of the page where you clicked “New shortcut” from the Context Menu.
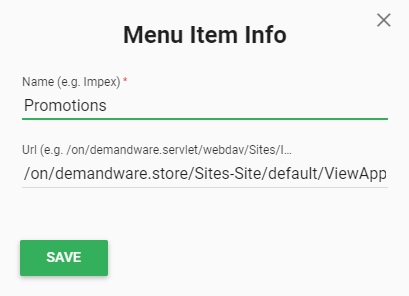
Give a Name to your new shortcut and click Save.
- Highlight Content - This will turn ON or OFF Highlight Content function described HERE.
- Salesforce B2C Documentation - Quick access to DOC2 version of Salesforce B2C Documentation.
- Developer Center - Quick access to Salesforce Developer Center.
Highlight Content
Highlight Content is an ultimate Storefront tool allowing you to easily separate externally loaded contents (such as content asset and slots) apart from a code written in .isml file.
On the Storefront page open the context menu and click on Highlight Content:
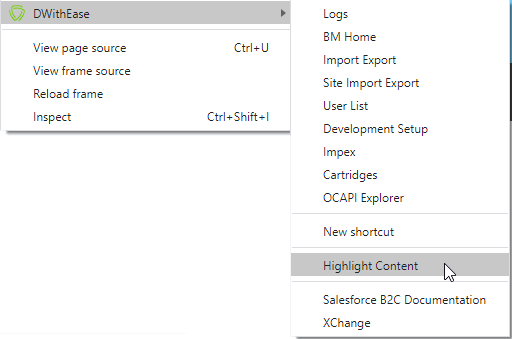
Hover over an area/element where you would like to check from which content asset it is coming from.
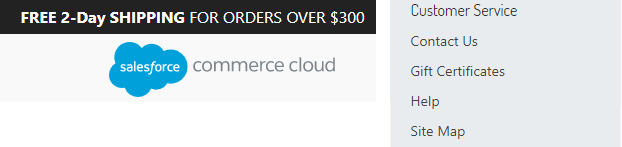
Highlight Content is turned OFF
Highlight Content is turned ON
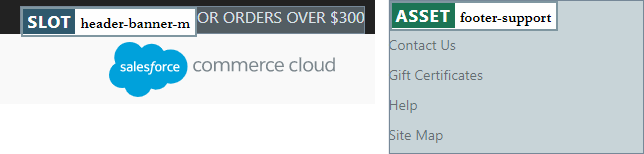
Clicking on the Slot or Asset header  will navigate you to the content Asset or Slot’s page. In this example the page will be Merchant Tools > Content > Content > footer-support.
This video will show how to use Highlight Content:
Was this page helpful?
Help us improve the DWithEase documentation.